The Battle for Messines Ridge
The Battle of Messines was fought on 7th June 1917 and was an attempt by the Allies to capture the Messines Ridge and the land to the southeast of Ypres, which would provide higher ground in the Ypres Salient.
The most notable feature of the battle was the successful coordination of various different aspects of the military, including artillery, infantry and engineering. As a result of this, the speed of the Allied assault was rapid, although this has been seen by some as negative as it resulted in many senior commanders becoming complacent and assuming victory was a foregone conclusion at the Third Battle of Ypres at Passchendaele.
The attack on Messines Ridge was scheduled for 7th June 1917 and was tasked to General Herbert Plumer’s Second Army. The plan had taken a year to put together and had seen the troops constructed deep tunnel systems under enemy lines.
The aim of capturing higher ground was reduce the German’s tactical advantages in the region. Initially, this was to take place over three days but this was reduced by Plumer and General Rawlinson to ensure it was a swift and brutal attack that would give the Germans no room for manoeuvre. This plan received the support of Field Marshal Haig who, following the Somme, wanted Allied attacks to be faster so they could gain more momentum.
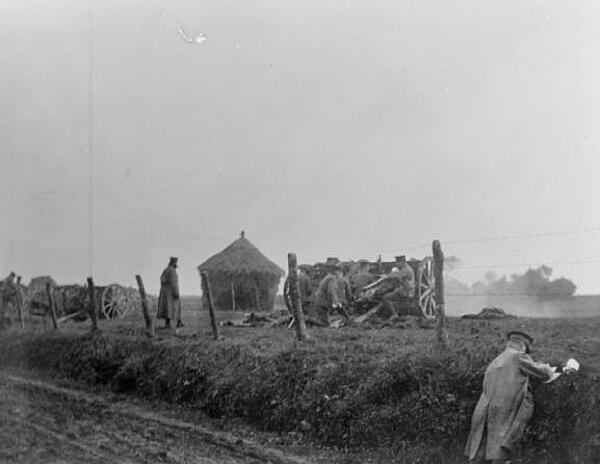
The coordination between the different military assets during the attack made it significantly different to any other than took place in the Ypres Salient. Engineering troops had dug tunnels under enemy lines and Messines and filled them with explosives, and artillery and infantry would using rolling barrage tactics to cover their advances.
In total, 21 tunnels were dug underneath German lines and were filled with 455 tonnes of Ammonal explosive. German engineers discovered one of these tunnels before the explosives could be fired, but no others were discovered.
Three corps from the Second Army were involved in the attack including:
1. British X Corps commanded by Lieutenant-General Sir T Morland
2. British IX Corps commanded by Lieutenant-General A Hamilton-Gordon
3. II Anzac Corps commanded by Lieutenant-General A Godley
Each of these corps was split into three divisions with a fourth held in reserve.
The British soldiers were facing men from the German IV Army commanded by Friedrich von Armin, who used a tactic known as the ‘elastic defence method’ - German front lines were lightly defended and men occupying these trenches would retire quickly to more heavily defended lines around half a mile behind them.
The attack on Messines Ridge began with an artillery barrage and in the week leading to 7th June more than 2,200 artillery guns attacked German lines with as many as three million shells, targeted towards German artillery positions thanks to up-to-date mass provided by Allied reconnaissance.
At 02:50 on 7th June, the artillery bombardment ended. The Germans moved into their positions, expecting the predictable infantry assault. However, at 03:10, the explosives underneath the Germans lines were detonated and around 10,000 Germans were killed, with many thousands more left disorientated. The explosives were so powerful that one even created a crater 40 feet deep and 250 feet wide. Shockwaves were felt as far away as Lille, 20 miles away. This impact had supposedly been predicted by General Plumer, who had told his senior staff prior to the attack: “We may not make history tomorrow, but we shall certainly change the geography”.
In the aftermath of the explosions, infantry from the three corps attacked with the help of a rolling artillery barrage. This made it incredibly hard for the surviving Germans to focus on the infantry advancing in front of them, and so rendered their machine guns almost useless. The first of the major targets was taken by 05:00, with the only hold up coming from the 47th Division who had to cross the Ypres-Comines Canal. However, even here the targets were reached by 12:00.
There was no let up in the attack and at 15:00 the second phase of the attack began using reserve divisions, who carried on from where the original attackers left off. Supported by tanks and artillery that had moved to the front line, they moved on to the next set of targets while those involved in the attacks rested. The next targets were reached by 16:00.
There were a number of counter-offensives by the Germans throughout the day but they all failed. However, surviving artillery was used to inflict casualties on advancing Allied soldiers.
Compared to previous battles that took place in Ypres, the attack on Messines Ridge was a major success that showed Allied commanders how effective a coordinated strike could be. More than 7,000 German prisoners were captured as a result of the attack, and while the Allies lose 24,000 men - 3,538 killed and just over 20,000 wounded or lost - this was significantly fewer than the 60,000 casualties on the first day of the Battle of the Somme.
Four Victoria Crosses were awarded for acts of outstanding bravery: Private John Carrol (Australia), Captain Robert Grieve (Australia), Lance-Corporal Sam Frickleton (New Zealand) and Private William Ratcliffe (British).
MLA Citation/Reference
"The Battle for Messines Ridge". HistoryLearning.com. 2026. Web.